
A MMU is basically just automating the filament swaps. But if you limit the required filament changes to a small number this can be done by hand. People have been using this with layer height-based filament swaps for quite some time. But this forces you to print specific layers completely in just one color each.
But if we look at prints like e.g. signs or flat surfaces with colored text or patterns, why would we actually need a MMU to print these? Actually, you don’t! I created a profile for the Prusa i3 MK3 that enables you to print in up to 5 colors without the need of any additional hardware.
The profile works with 5 “virtual” extruders. So, it allows you to slice any multi color object in the same way you would do it for a multi material printer.
The required M600 commands for filament changes will be added automatically where required. This means it allows you to change color up to 5 times as well in the middle of a layer.
Getting started: How to use this with your MK3?
Download the required files here: Rainers MK3 Multicolor profile 1.0 and extract the archive to a new folder on your PC.
i am using the currently latest Slic3r version 1.42.0 alpha 5. This or any later version should work with the provided profile file.
Startup Slic3r in the Menu open File=>Import=>Import Config
now import the file „RainerS Prusa i3 MK3 Multicolor.ini“
This is how Slic3r should look like with the imported profile:

A new Printer, a print profile and 5 different PLA Filaments have been loaded automatically. You can use your own Filaments of course, but you should set the correct color for each filament. Preferable you should choose „pure“ colors where the RGB values are either 0 or 255.
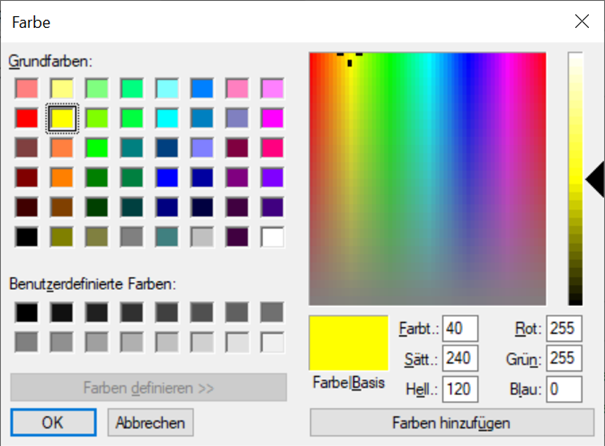
In this example of a yellow filament you can see that Red and green are both set to 255 and blue is 0. This will help when printing as the filament change script i created will calculate the correct color names for all „pure“ colors based on these RGB values.
Slicing a multicolor object
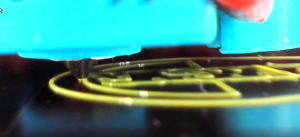
Ok now where the profile is loaded, let’s start with a simple 2 color print.
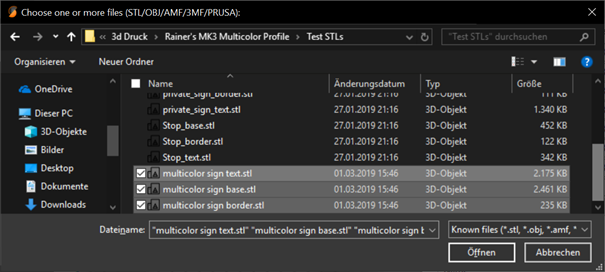
Click on the „+“ symbol in the plate view just as you would normaly do it to add an STL file. The one thing which we are doing different here ist hat we will directly add 3 STL files with one add operation instead of just one. So in the file dialog, navigate to the „Test STLs“ folder and select the following 3 files:
Then click on „open“ to load the files. A dialog will appear, asking you how to import the files:
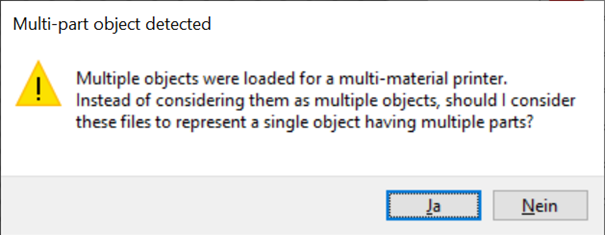
As we want to print this as a multicolor object, choose „yes“
The STLs are now loaded. Click somewhere on the empty area of the build plate and you screen should look similar to this:
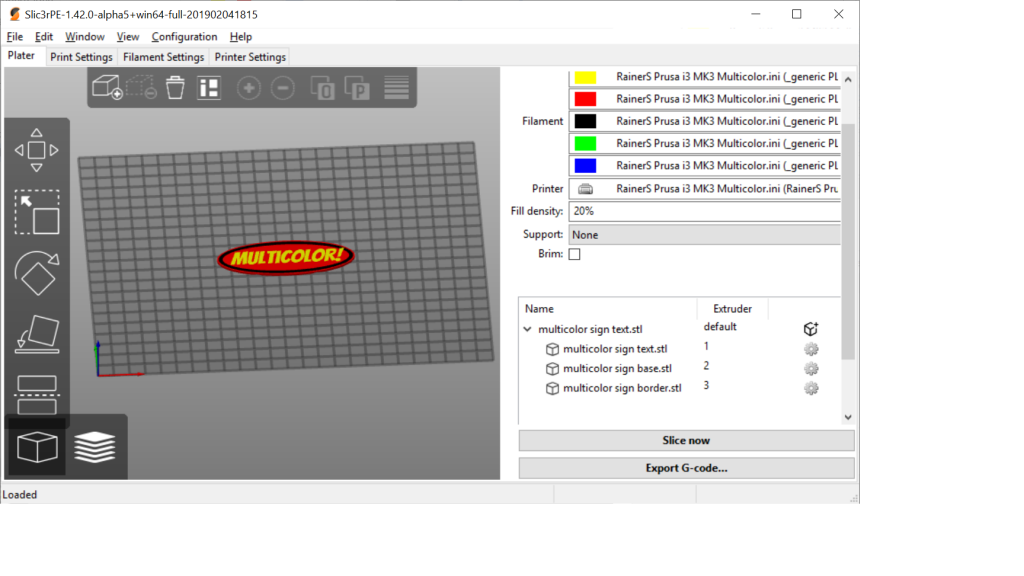
On the right, you can see the 3 individual files that we have loaded. Each represents an individual part of the combined object.
By default slic3r will automatically assign a separate extruder to each file. You should adjust that in order to have the correct „extruder“ for each color.
We are going to print this with a yellow base and a red for the border & text, so click on the extruder numbers to choose the extruder with the correct color for each of the parts:
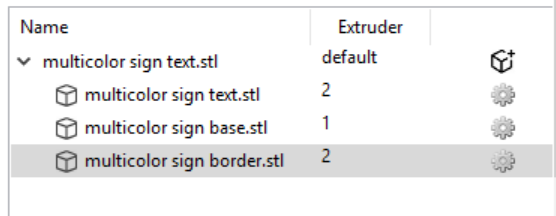
The “multicolor sign base.stl” should be yellow, yellow filament is assigned to extruder #1 above so choose „1“ for that part.
The other 2 parts should both be in red, so assign them to extruder #2.
Later when we print, the generated GCODE will automatically add a manual filament change command whenever the print needs to change to a different extruder #.
Previewing the sliced object
Now we are ready for slicing, so click on „slice now“ and change to the „preview“ tab in Slic3r.
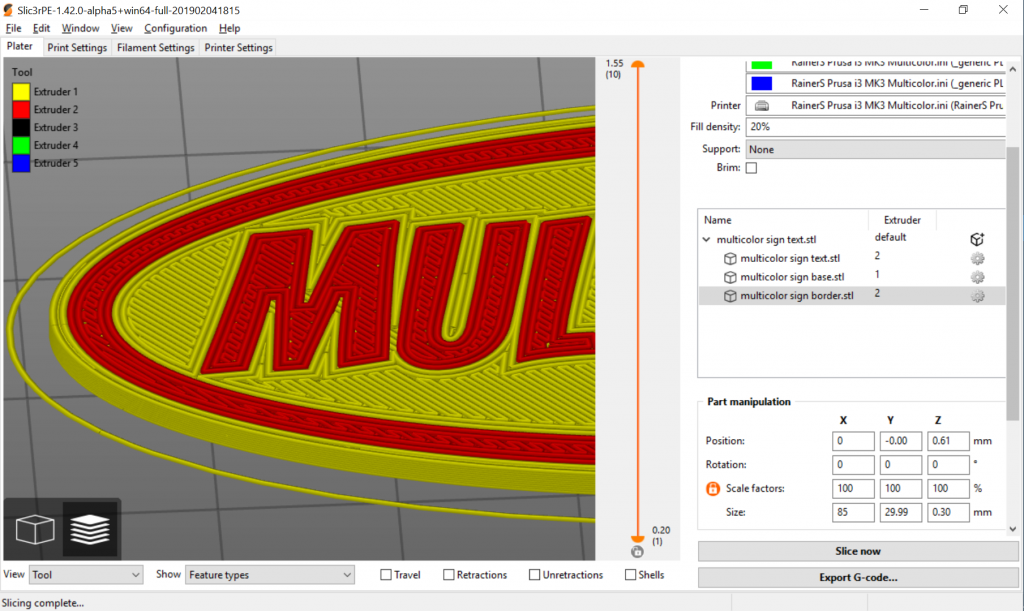
As you can see, the object has been sliced correctly using the different extruder colors.
So now is a good time to send it to your printer. If you are using Octoprint, you have to set the connection details for your Octoprint instance as usual, alternatively export the GCode and transfer it to your SD card.
Printing the multicolor object
When printing, the color of extruder #1 will be used first (assuming that your initial layer contains that color), so start with loading yellow PLA filament into your printer.
Now start
your print.
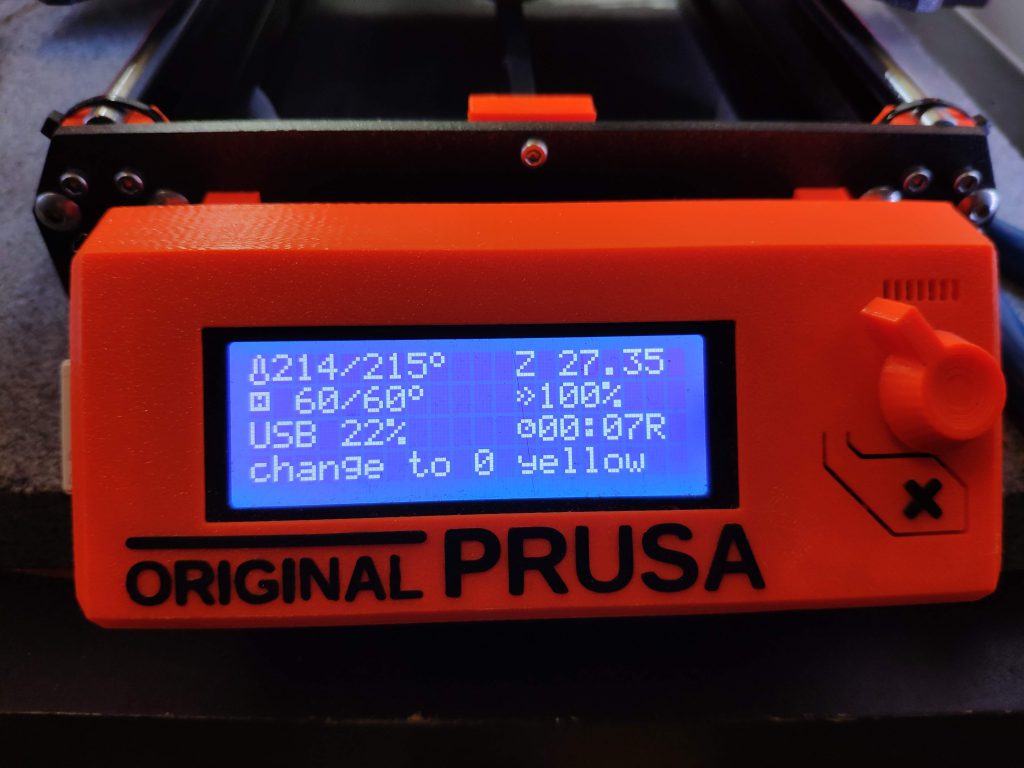
as soon as a filament change is needed, the printer will display a message like
„change to red extruder 2“. Unluckily the message will only be displayed for
1-2 seconds. This is due to a limitation / bad implementation of the m117 /
m600 commands.
As we are printing with only 2 colors, it is quite easy to guess which filament color should be loaded next.. in this case red.
There will be one further filament change back to yellow required for this specific print before it is done.
Advanced: Printing with more than 2 colors
Printing with more than 2 colors works basically just like the example above. only difference is that you assign more than 2 extruders to the parts in your print.
Where it gets a little more challenging is the order of the filament changes.
If you want to get a list of filament changes in your print, you can achieve this quite easy.
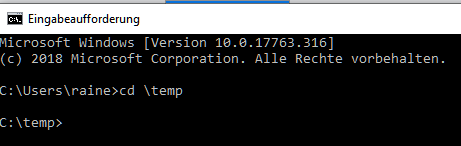
first slice your object using more than 2 extruders. than export your GCode file (i chose “multicolor.gcode” as the filename) to a folder on your PC and open a command-line.
Change to the folder where you saved the GCode (in my example c:\temp)
now type the followng command:
find “change to” multicolor.gcode
If you used a different file name, change it it in the command accordingly.
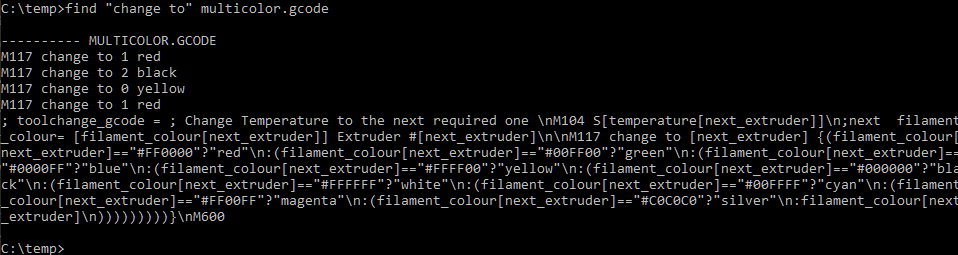
you can ignore the line starting with “; toolchange gcode”.
the other lines tell you the order of filament changes in your print
M117 change to 1 red
M117 change to 2 black
M117 change to 0 yellow
M117 change to 1 red
This does not include the initial color which would be the color of extruder 1 (yellow) in this case.
The color names will only be displayed if your filaments have been assigned “pure RGB colors with RGB values of only 0 or 255, or all 3 values set to 127 for “silver”
Ok, thats all.. if you have any questions or want to leave some feedback, just leave a comment.
How this could be enhanced. Change Request for the Prusa MK3 firmware. Get Involved!
One thing i am not totally happy with is the way the user is getting informed which color you need to change to next. I have some gcode included that outputs a message using the M117, which displays a message like ” change to 1 red ” just before the M600 command.
Due to limitations in how Prusa implemented the M600 command, the message will be cleared as soon as the printhead reaches the “FIlament Change position”.
I already raised a feature request to add a message parameter to the M600 command which would keep this message visible at the beginning of the filament change. So far it did not get a lot of attention, so if you want to support this, leave a comment in the change request to push this a bit.
here is the link to the feature request: https://github.com/prusa3d/Prusa-Firmware/issues/1471
Update 2019-03-09: Thanks to the work of guy.k2 on the Prusa forum we have a working prototype and a Pull request for the official Prusa MK3 forum for a small change to the M600 command to add a new “Q” parameter which allows to suppress the initial filament change message of m600. This allows the message of the m117 command to be made persistent. I currently run a compiled version of this on my MK3 and can confirm it s working great!
If you want to read about the details or give it a try yourself check out this thread on the Prusa forum:
Creating more STL files optimized for this printing method
i created some customizable things that are optimized for this method. the color will be limited to about 2 layers so the number of required filament changes wil stay reasonable low. check this page for the customizable sign workshop
Another example is my customizable comic sign

tisjja
2 Oct 2019Thank you so much!
Nescio
4 Oct 2019Ok. I am thinking how could i setup it for my Ender 3 pro. I am a newbie in 3d printing but i thought i could do something by manitulapting the gcode and, so, i found your post.
I use cura, so, for now, i don’t know yet how to add en additional -virutal- extruder to the printer. I will download slic3r and i will try.
Have you some suggestion for adapting your script to my printer?
Thanks.
rainerwp
20 Oct 2019as long as your printer supports something like the G600 command for a manual filament change mid print, you should be able to get it working…
Shah
16 Oct 2019how to include more than 5 colors?
rainerwp
20 Oct 2019Hi Shah,
you can start by increasing the number of “extruders” in the printer profile
Rainer.
Alex
25 Oct 2019Did the firmware ever get updated? Does it work on the MK3S? Had these questions since the pull request on github was taken down
rainerwp
25 Oct 2019Unluckily nobody from Prusa ever reacted to the pull request.. So it did not get approved.
if you want to try it out you could as well try this FW version: https://github.com/guykuo/Prusa-Firmware/tree/0.9-Degree-Stepper-Support
but the above procedure works as well without the FW change. the FW change is just for allowing a better message to prompt for the right colour on the LCD screen. Everything else should work as well without the FW change.
MK3S should work as well..
James Jordan
27 Nov 2019Will this work on a MK2?
rainerwp
27 Nov 2019This specific profile was created based on a slic3r mk3 profile.
But the same technique can be used for any printer that supports a filament change via e.g. M600 command.. and i am quite sure that the MK2 supports that as well.
So based on my profile you could create your own for a MK2 printer.
Emre
7 Jan 2020Hello. Is that still working? I couldnt import this profile on mk3s. 🙁
rainerwp
7 Jan 2020Yes, it is working fine. you can import it into slic3r via “File=>Import=>Import Config”
Lori
23 Jan 2020Question, when I changed the filament, it was too low for me to grab all of the extruded filament before it started, so it made a mess and I powered off. When I turned it back on, I tried to resume the print, but I’m not sure what happened, it said bed complete but did not start printing. Can I go back and start the print at the filament change? Everything is still in place I just turned it back off.
jonnieZG
18 Feb 2020This is great, thanks! BTW, you have an error in your INI file, line 80, first_layer_temperature should be “215,215,215,215,215” (currently you have 225 for the 3rd extruder: “215,215,225,215,215”).
Also I always manually remove the first M600 command from the generated gcode to skip the unnecessary filament change after the intro line).
You can also consider changing the extrusion_multiplier to a value higher than 0.95.
Thomas Denner
5 May 2020Dear Rainer,
this looks awesome. I was looking exactly for such a solution. I use PrusaSilcer 2.2.0 and face the following problems:
– I can import MCnoMMU.ini and the new printer appears. It actually shows 8 filaments rather than 5!
– unfortunately, when I close the program, the new printer disappears and dies not show up on the next start. Is this normal or is there a way to permanently install this printer so that I could choose between the normal and the multicolor version without importing the .ini again?
– I usually print with Prusament PETG – actually I have only a single spool of PLA :-). With the Multicolor Printer loaded, PETG is not offered as Filament. Only different colors of PLA are shown. Is there an easy way to build a Prusament PETG-Version?
– I use Fusion 360 as CAD-System and can easily create the multiple STLs for a multicolor project. F360allows to export the different bodies to a single STL. It seems that Prusaslicer cannot read such files as multicolor STLs – it just shows one body. Is this normal or do a make a mistake?
Other than that, it seem to work – I get a gCode with color changes and the text file with the color order … great work and once I get it to PETG, I will make a test print.
Frank-The-Rock
8 May 2020I read the thread on Prusa forum An find your 2 new versions I used the last one as a base to build one and it work. Its a weird thing now, with your file I dont see my filament or printing profile… its the new Vendor thing. I have redone copying your Filament change g-code and it work great! Now for filament list I saw your Batch file but i dont see how its call by the slicer ?? could you elaborate on that please ? thanks for the great work and inspiration!